Photoshop is no doubt one of the best image editors available out there. It packs some really great tools to let you edit and enhance your photos. Pretty much everything that you’ll ever want to do with your photos can be done using Photoshop.
It includes basic tasks like resizing your photos and some advanced tasks as well like applying various effects, such as the mirror effect, to your images. Performing these tasks in the app is pretty easy but you can definitely use some help to get your tasks done faster.

Resize An Image In Photoshop
Often when you upload files to a website or you want to send a photo to someone and it’s a bit too large in size, you need to change the size of the image so it fits the requirements.
Photoshop helps you quickly and easily resize your photos using multiple size units and options.
- Open your photo in Photoshop on your computer.
- Click on the Image menu at the top and select Image Size.

- Under the Pixel Dimensions section, you can change the Width and Height values of your photo. Set it to whatever you want and make sure the correct size unit is selected from the dropdown menu next to your values.
Then, click on OK.
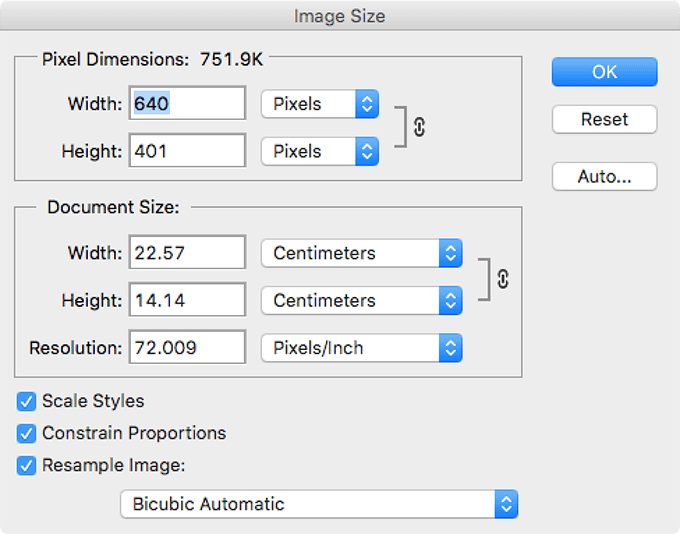
- Changing either width or height (but not both) of the photo maintains the aspect ratio. However, if you don’t want that, then you can uncheck the Constrain Proportions option on the resize panel.
Crop a Photo In Photoshop
You’ll want to crop your photos if they have some extra elements in them that you don’t need. Cropping lets you keep only the selected part of your photo deleting everything else.
Photoshop lets you crop both manually and using pre-filled values.
- While your photo is open in Photoshop, click on the crop icon in the tools list.
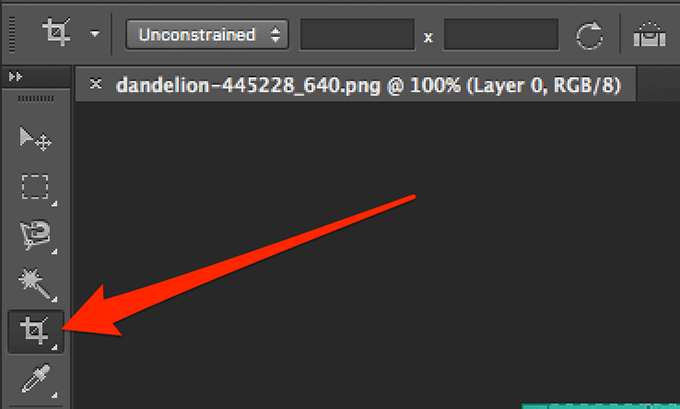
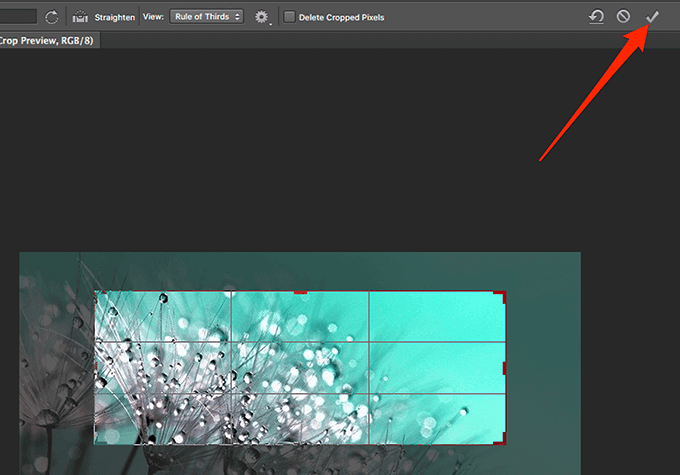
- Click on your photo and you should be able to select the parts that you wish to keep. When you’re done, click on the icon highlighted in the below screenshot to save the changes.
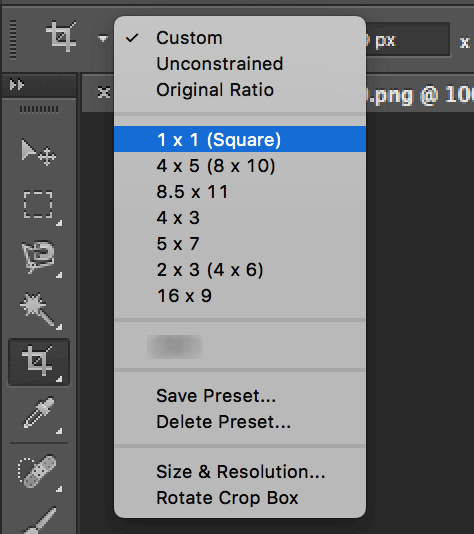
- If you want to crop the photo so that it is of a specific size, then you can enter the size values in pixels at the top of your screen.

- You can also choose one of the default options to crop your photo, such as the square crop option that helps crop your photo in a square shape, and so on.
Flip An Image In Photoshop
When it comes to flipping a photo in Photoshop, you have two ways to do it. Either you can flip the entire image which will flip everything you see on your screen or you can flip a select layer. The latter will only flip the contents within that layer and not the entire image.
- To flip an entire image in Photoshop, click on the Image menu at the top and select Image Rotation. Here, you’ll see two options namely Flip Canvas Horizontal and Flip Canvas Vertical.
You can choose any of these options to flip your photo.
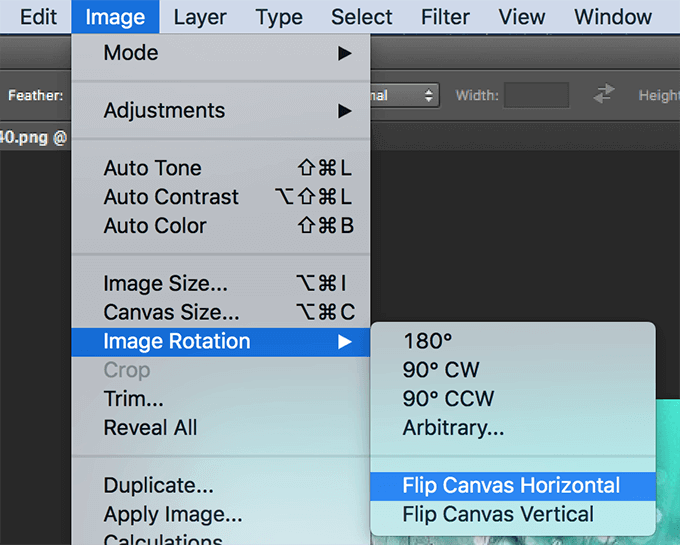
- If you’re only looking to flip a select layer, select that layer, click on the Edit menu at the top, select Transform, and choose either Flip Horizontal or Flip Vertical.

Blur An Image In Photoshop
Blurring helps you hide sensitive information in your photos and there are multiple tools to do it in Photoshop. You can select the area that you want to blur and then choose one of the available options to blur it.
- If you want to blur an entire photo, click on the Filter menu at the top, select Blur, and choose any of the available blur options.

- If you apply a blur effect and you don’t like it, hit Ctrl + Z to undo the effect.
- To blur a select area in your photo, use the selection tool to select the area first. Then, use the same Filter > Blur menu to blur your photo.
How To Zoom In & Out In Photoshop
High-resolution photos often require you to zoom in to see certain parts that aren’t clearly visible in normal viewing mode. Photoshop allows you to zoom in and out to a great extent, and there are various ways to access the feature.
- While your photo is open in the app, click on the zoom tool in the left tools list.
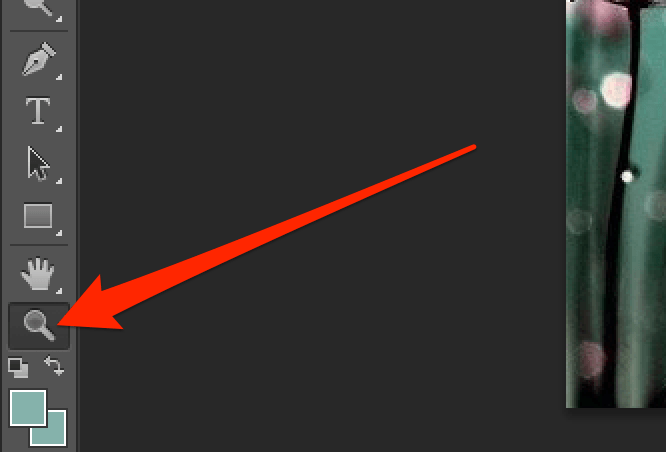
- Click where you want to zoom in on your photo and the photo will enlarge itself.
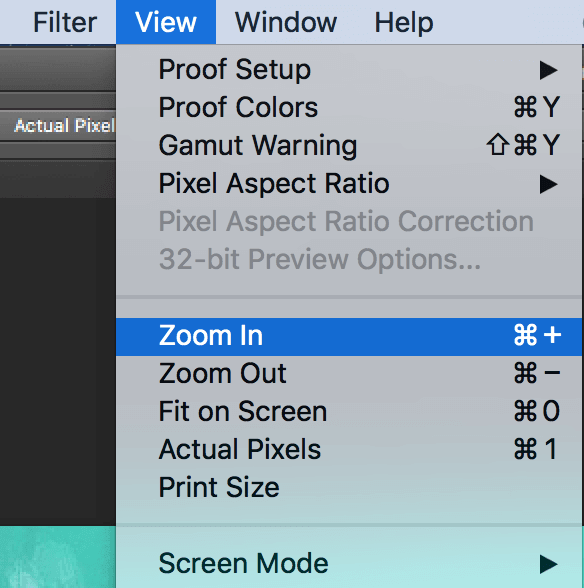
- Another way to zoom in or zoom out is to use the View menu. Click on the View menu at the top and choose either Zoom In or Zoom Out depending on what you want to do.
Rotate a Photo In Photoshop
If your photo is in portrait layout but it was supposed to be in landscape layout or vice versa, you can fix it by rotating it in Photoshop. You have multiple directions to rotate your photo in the app and it’s pretty easy to do.
Your photo will then adapt the orientation that you choose in the app.
- Open the image you want to rotate in Photoshop.
- Click on the Edit menu at the top and select Transform. You’ll see three rotate options as follows:
Rotate 180 – it rotates your photo 180 degree
Rotate 90 CW – it rotates your photo 90 degree in clockwise direction
Rotate 90 CCW – it rotates your photo 90 degree in counter-clockwise direction

- Make sure to save your image after rotating it.
Mirror a Photo In Photoshop
The mirror effect can be achieved by combining multiple tools into a workaround in the app.
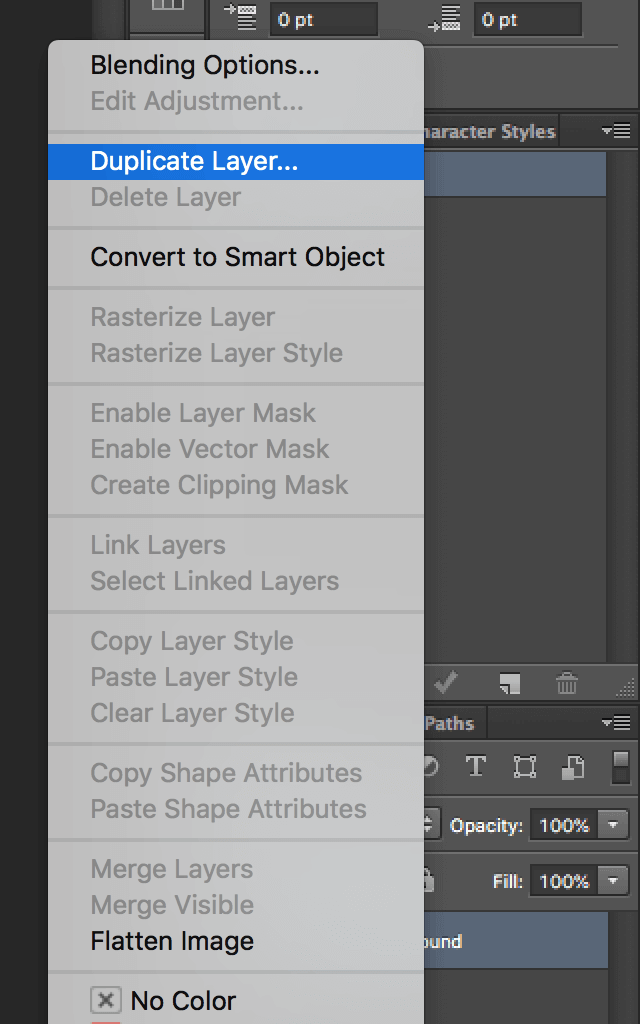
- Right-click on the Background layer and select Duplicate Layer.
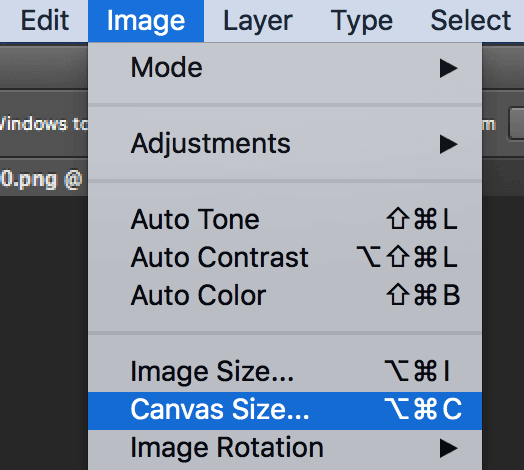
- Click on the Image menu at the top and select Canvas Size.
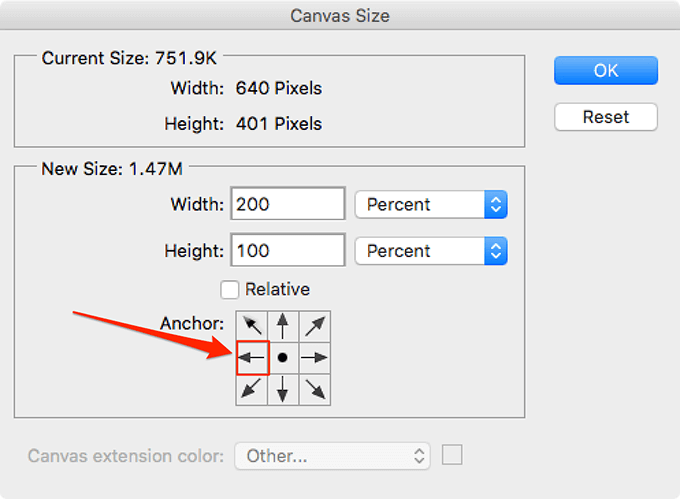
- Change the size unit to Percent and enter 200 in the Width box. Then, click on the left middle icon and hit OK.
- Click on the move tool and drag the image over to the right side. You’ll now have two exactly same images on your screen.

- Click on the Edit menu and select Transform followed by Flip Horizontal.

- Your photo should now be mirrored.
Photoshop has immense capabilities to help you edit and retouch your photos. Do you use it to enhance the visuals of your photos? What’s your favorite tool in the app? Let us know in the comments below!
from Online Tech Tips https://ift.tt/2UixYmY
No comments: